How to Draw a Teary Eye
Tears are a natural and healthy response to sadness, grief, or pain.
There are five types of tears: basal tears, reflex tears, emotional tears, irritant-induced tears, and trophic-induced tears.
Basal tears keep the eye moist and provide nutrients to keep the cornea healthy. Reflex or emotional tears help to cleanse dust or other particles from the eyes and provide lubrication for dry eyes. Irritant-induced or emotional tearing helps to flush out irritating substances from the eye, while trophic-induced tearing provides nutrients to cells of the cornea and conjunctiva.
The first known drawings of tears were found on the walls of ancient Egyptian tombs and date back to 2600 BC.
In this tutorial, we are going to teach you step-by-step how to draw realistic tears.
What you’ll learn:
- How to Draw a Teary Eye
- How to Shade and Detail a Teary Eye
Materials needed:
- A piece of paper
- A 2H graphite pencil
- An 8B graphite pencil
- Graphite Powder
- A Soft Blending Brush
- A Blending stump
- An eraser or a kneaded eraser
- A Tombow Mono Zero 2.3mm
- A White Gel Pen
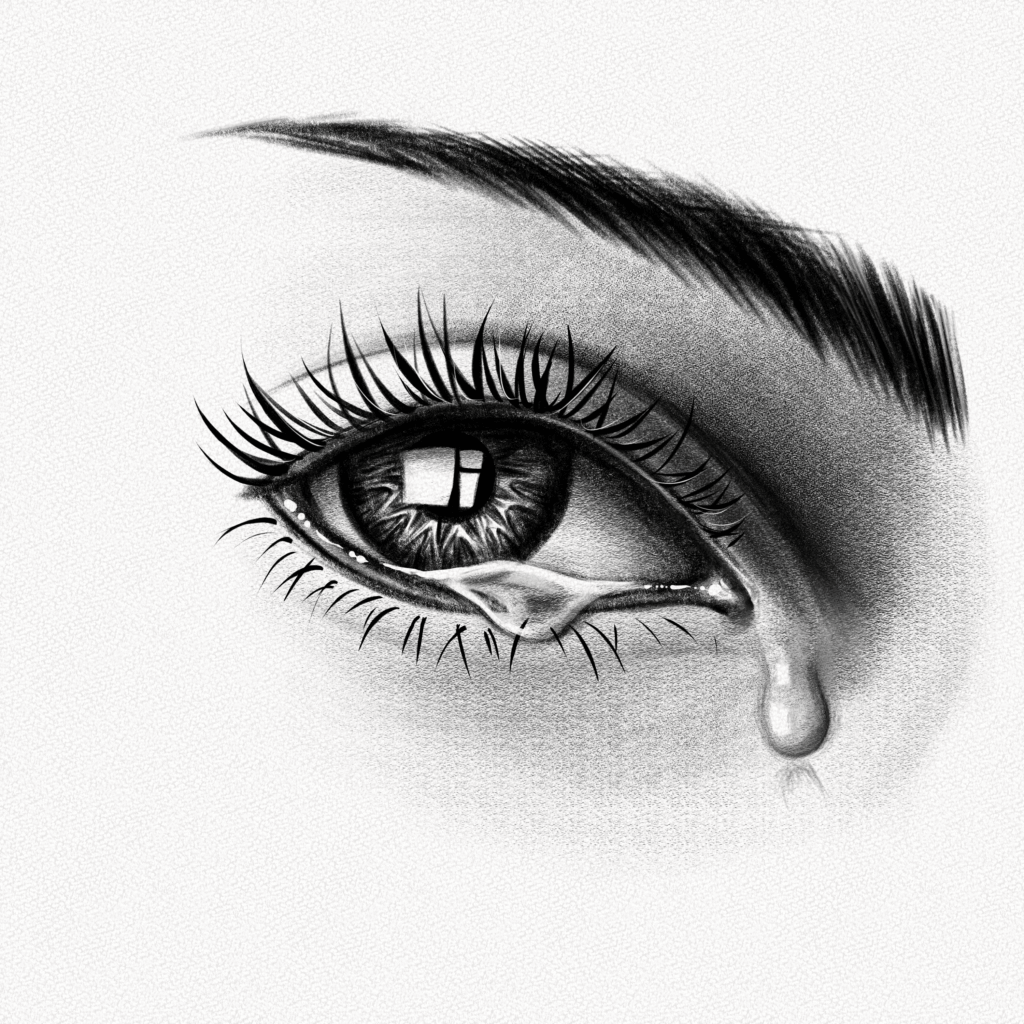
This is the teary eye you’re going to draw:
And these are all the steps we’ll walk you through:
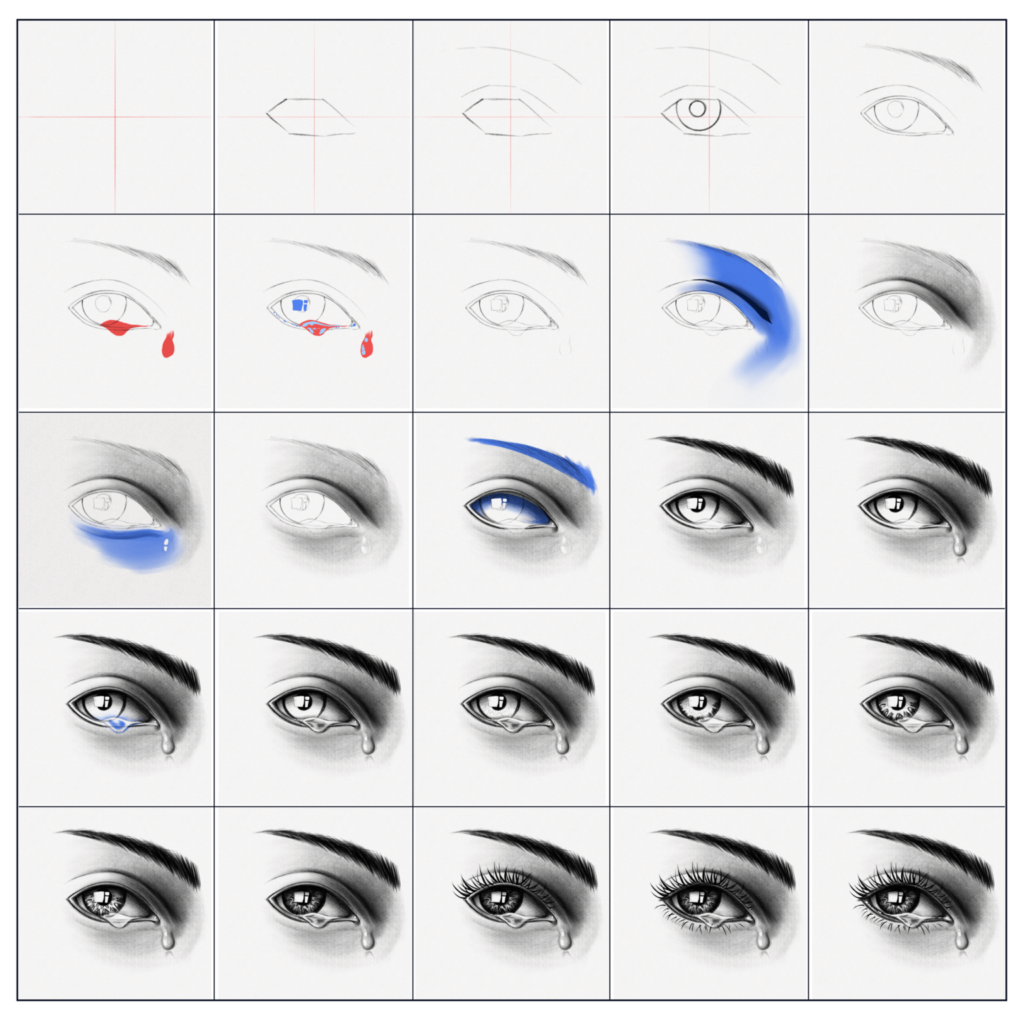
Section 1.- How to Draw A Teary Eye
Realistic drawing is a challenge for many. However, once you actually get a good grasp on it, you realize it is more of a technique than in-deep learning. Although we do have a complete tutorial on how to draw eyes, this is a guide on how to draw realistic tears/how to add tears to an eye(s).
Step 1: Split your canvas
Split your canvas into four equal parts. You might’ve heard about the grid method for realistic drawing. This won’t be a grid method per se but a guide to help you place your lines better. The eye in this guide is not referenced anywhere. However, if you do have a reference, do the same with it.

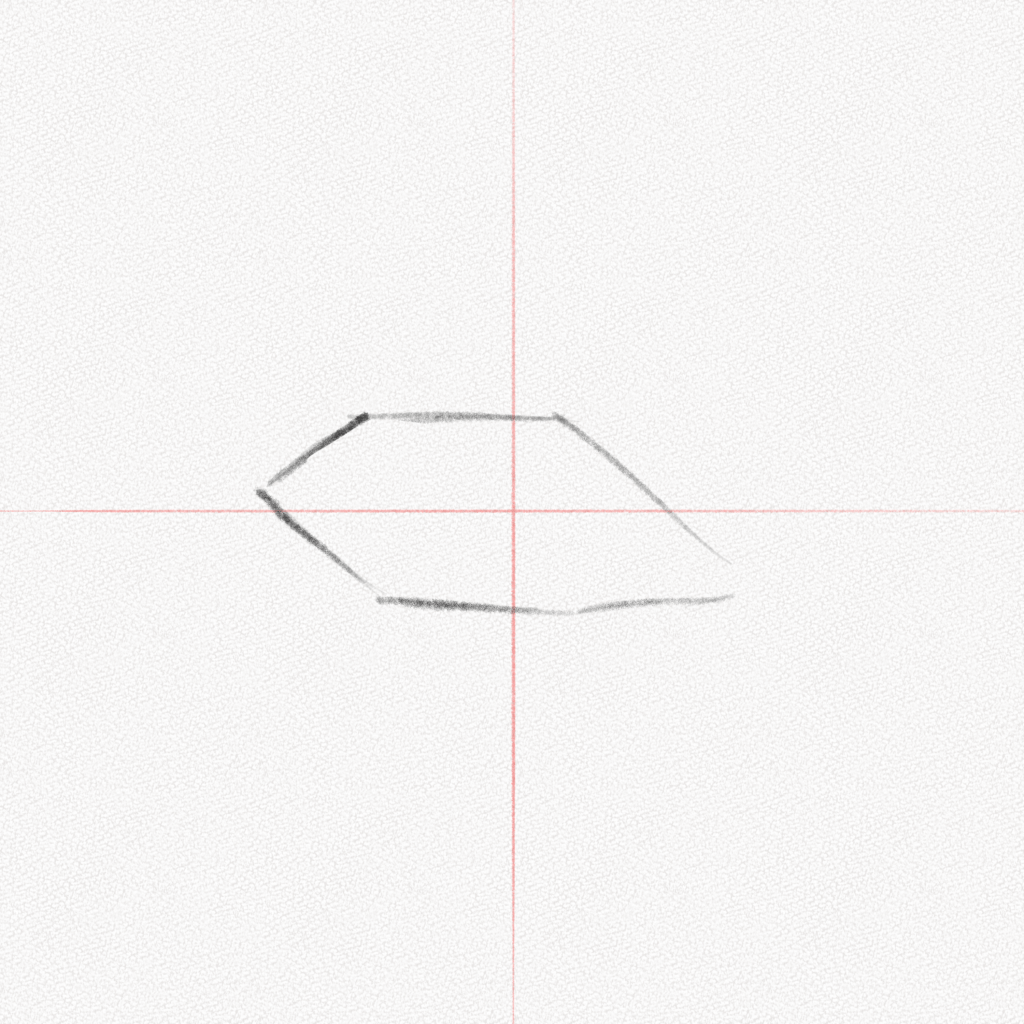
Step 2: Draw the eye’s structure.
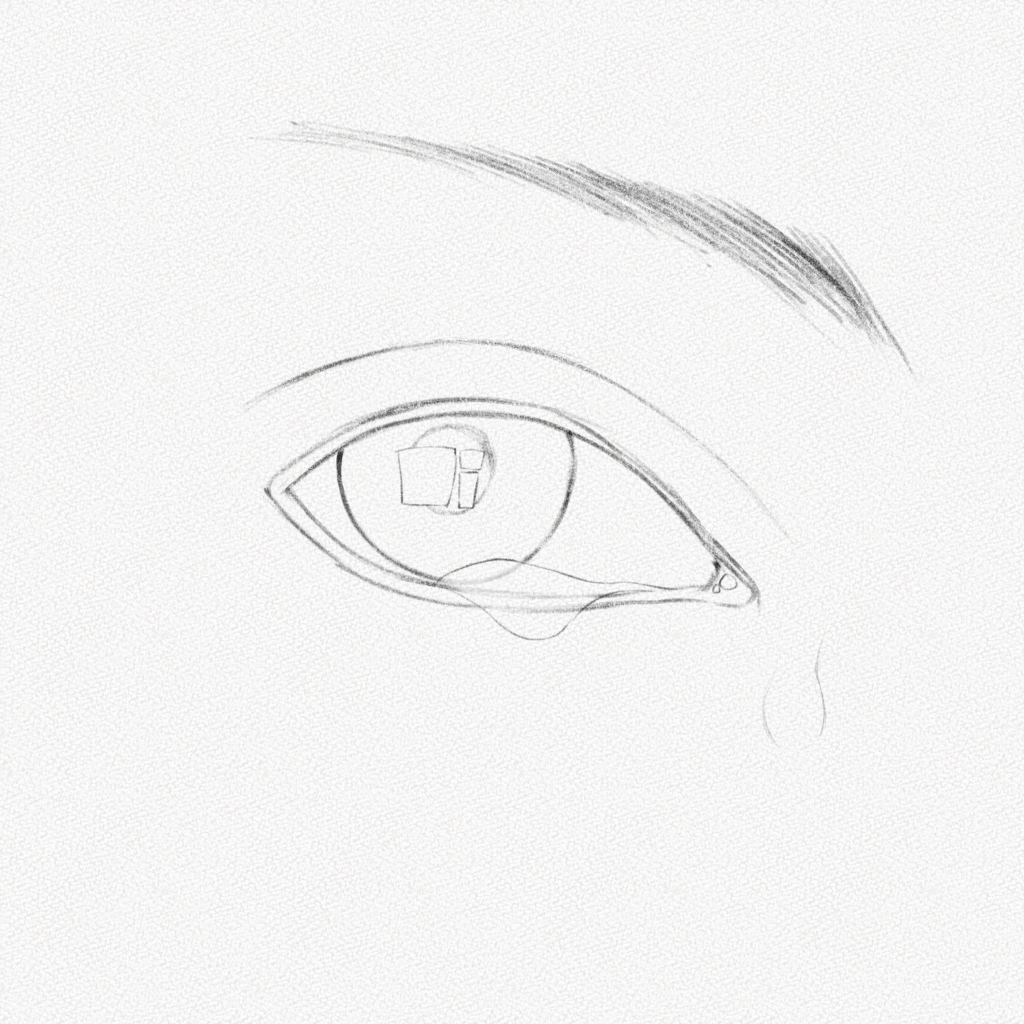
Draw an irregular hexagon-like shape (as shown in the diagram) where you want to place your eye.
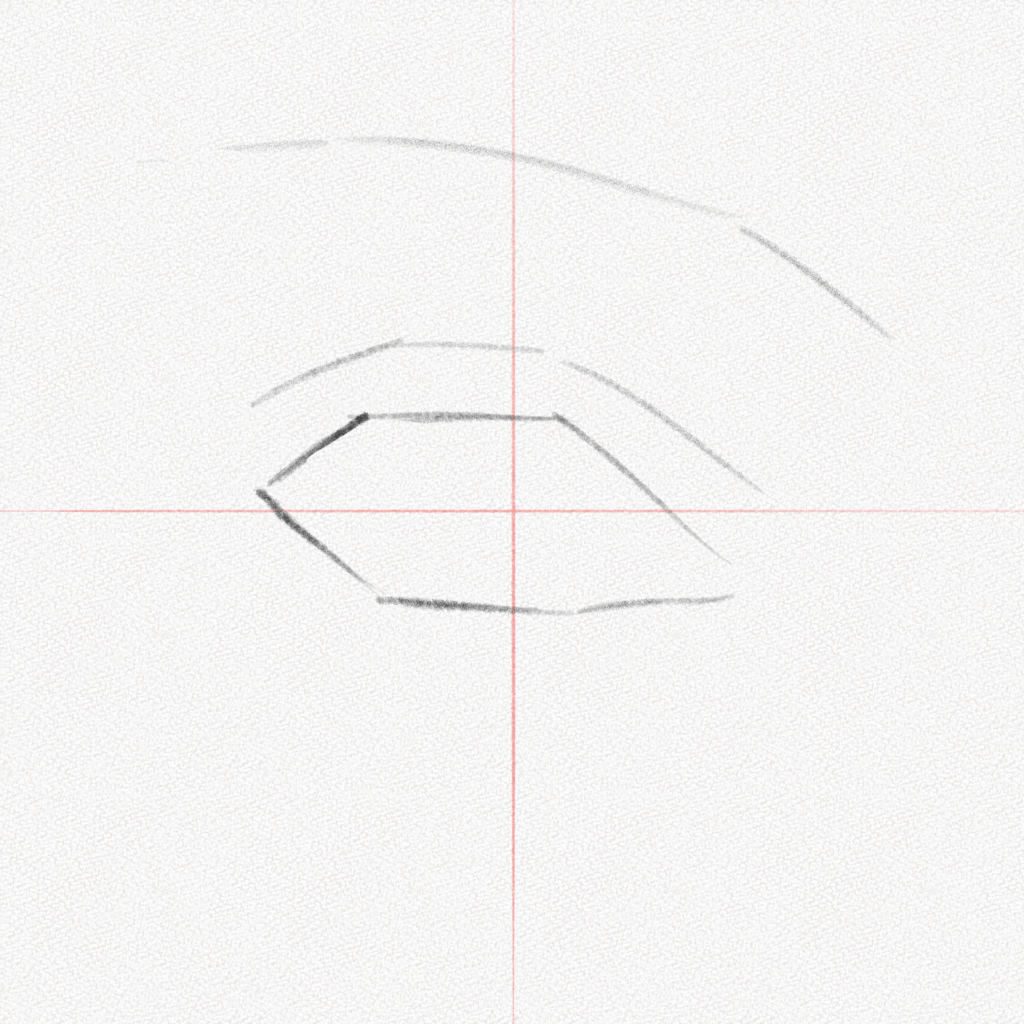
Step 3: Place the eyelid and eyebrow
Place the eyelid and eyebrow with soft lines.
Step 4: Draw the iris and pupil
Draw the iris and pupil as well. Make sure the shapes look good before you move on to the next step.
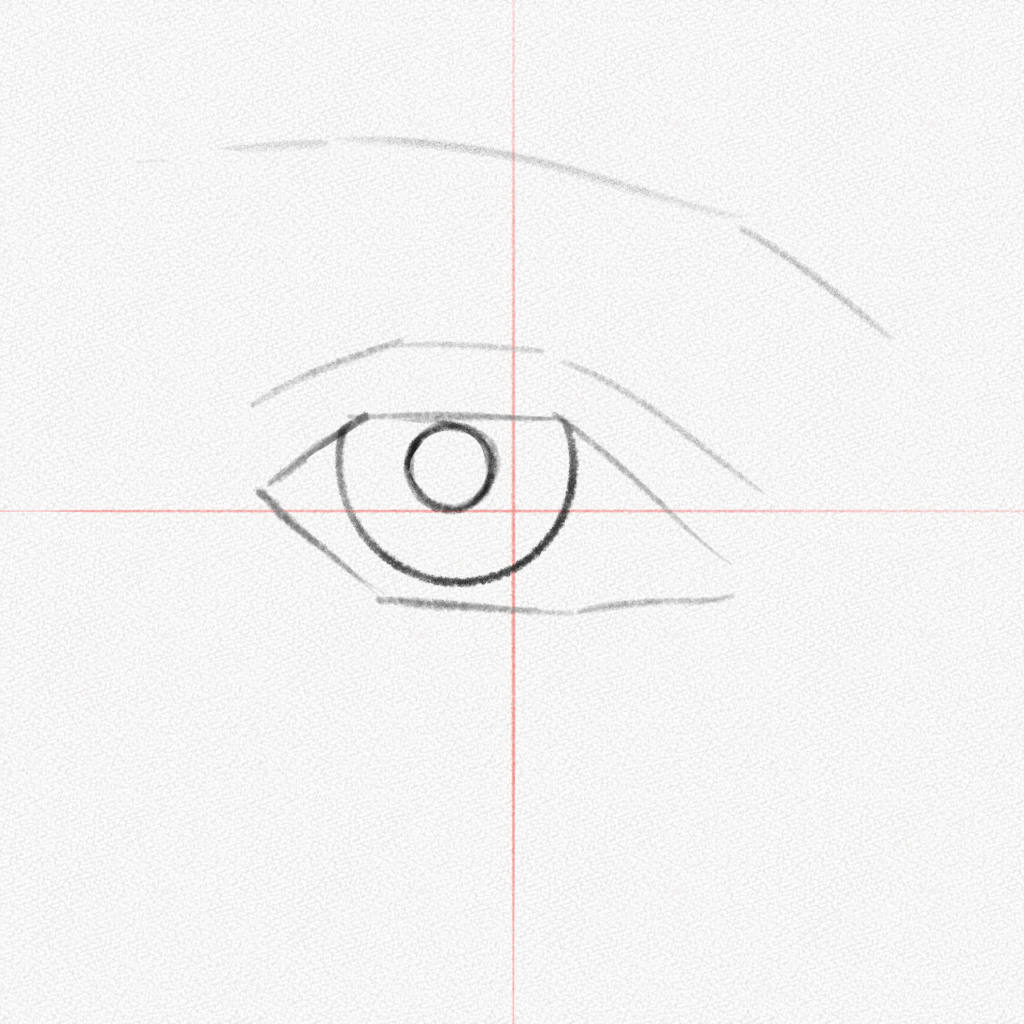
Step 5: Sketch the eye and eyebrow
Erase your guidelines and start sketching with more organic lines, the shape of the eye. Don’t forget about the waterline and the lacrimal. Use soft lines as well to shade the eyebrow area and define the eyebrow shape.
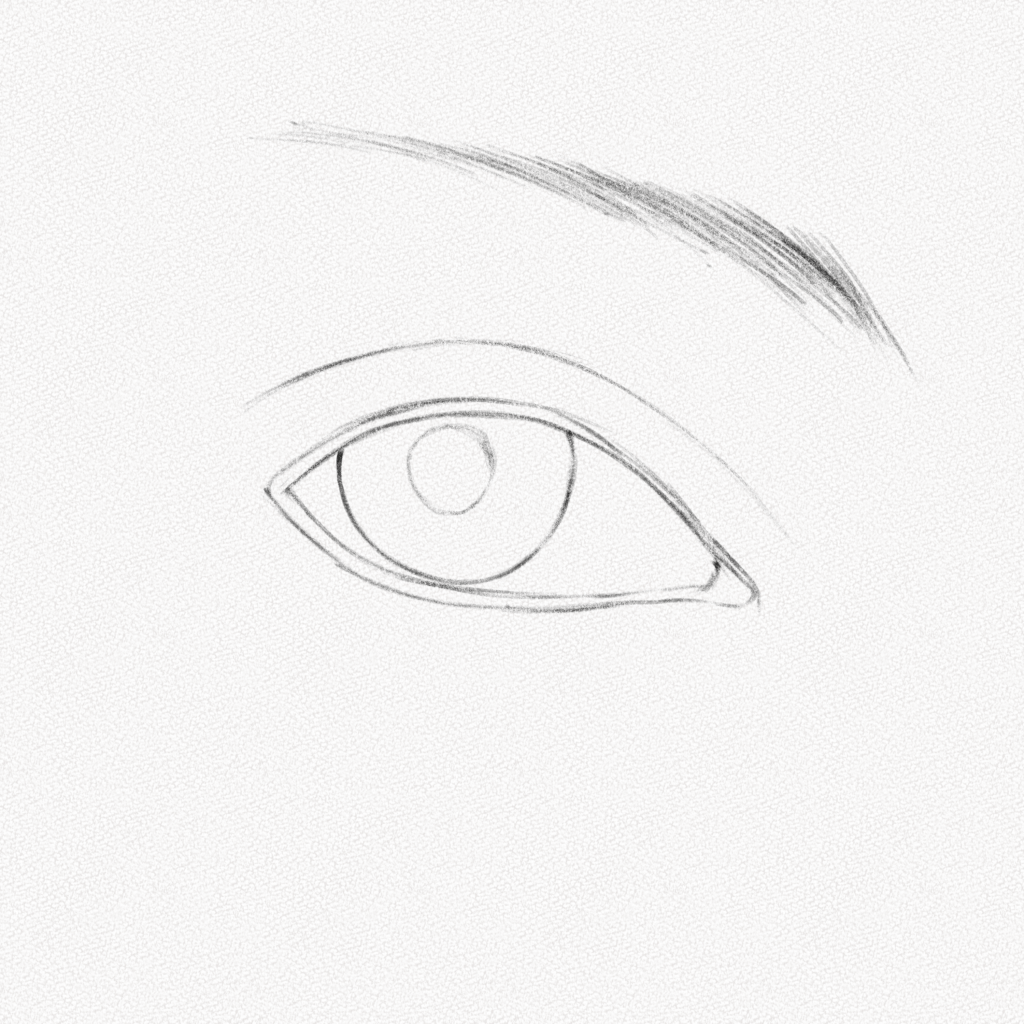
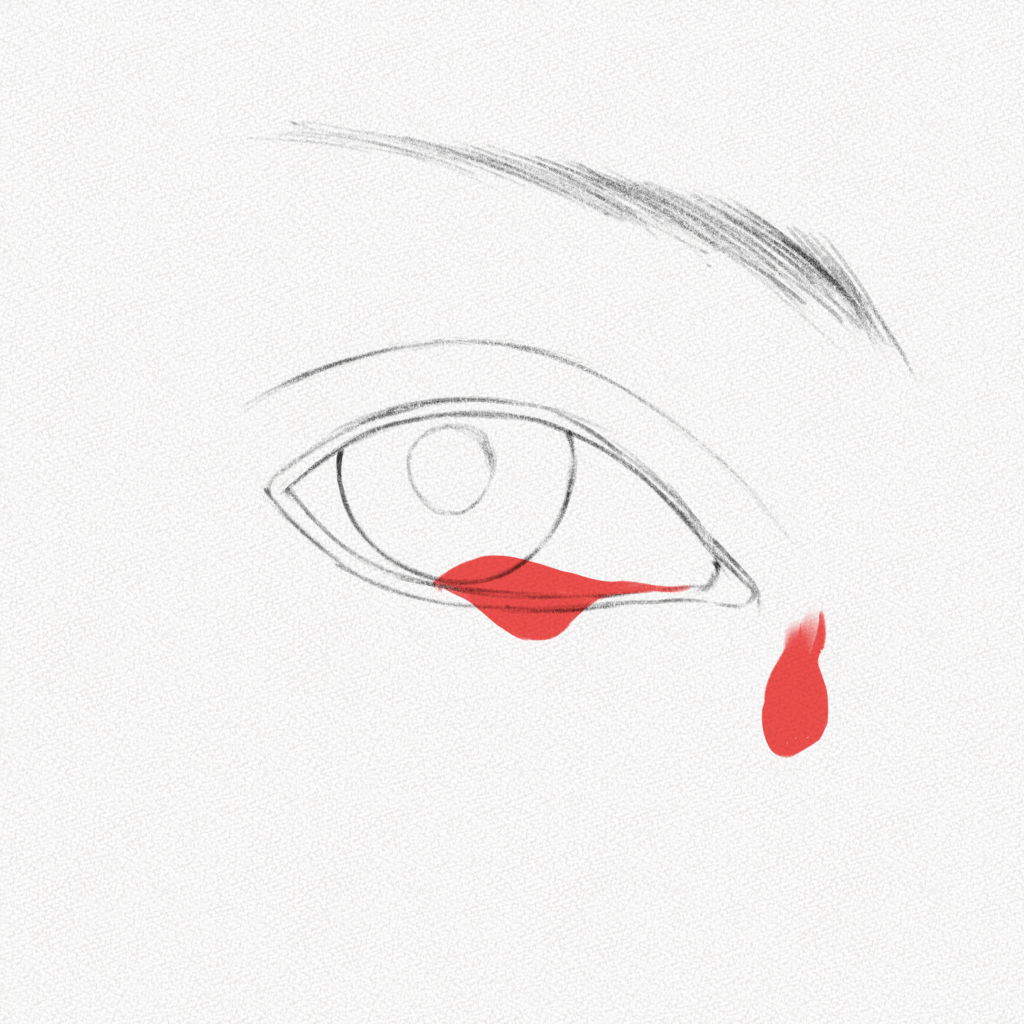
Step 6: Place your tears
Use your imagination (and references) to find the perfect spot to place your tears, visualize them and use your 2b pencil to mark them very softly.
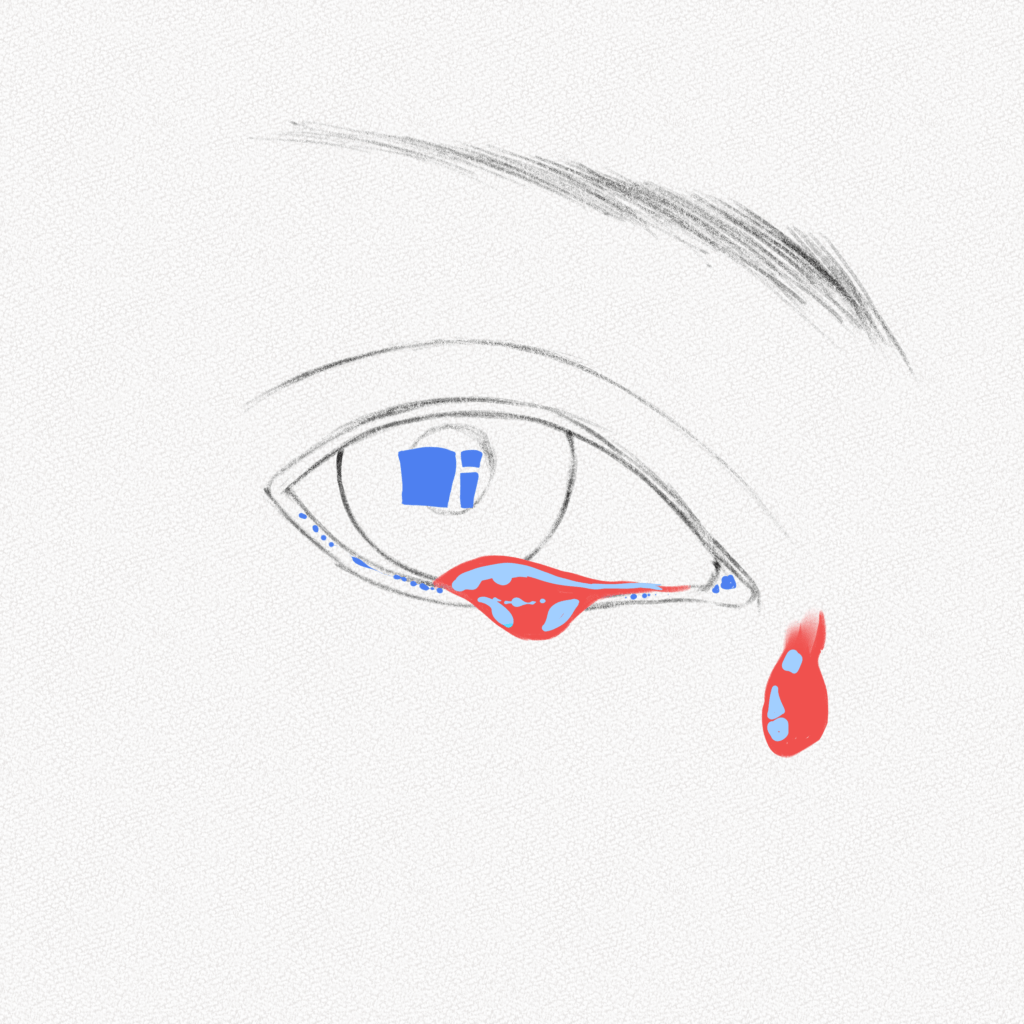
Step 7: Mark your highlights
Please do the same for your highlights since we’d need to mark them beforehand, so we won’t shade or draw over them.
Section 2.- How to Shade and Detail a Teary Eye
Now that we have our base done, we’re ready to start shading. For this section, we are going to use our graphite powder, soft brush, and blending stump.
Step 8: Shade the upper part of the eye
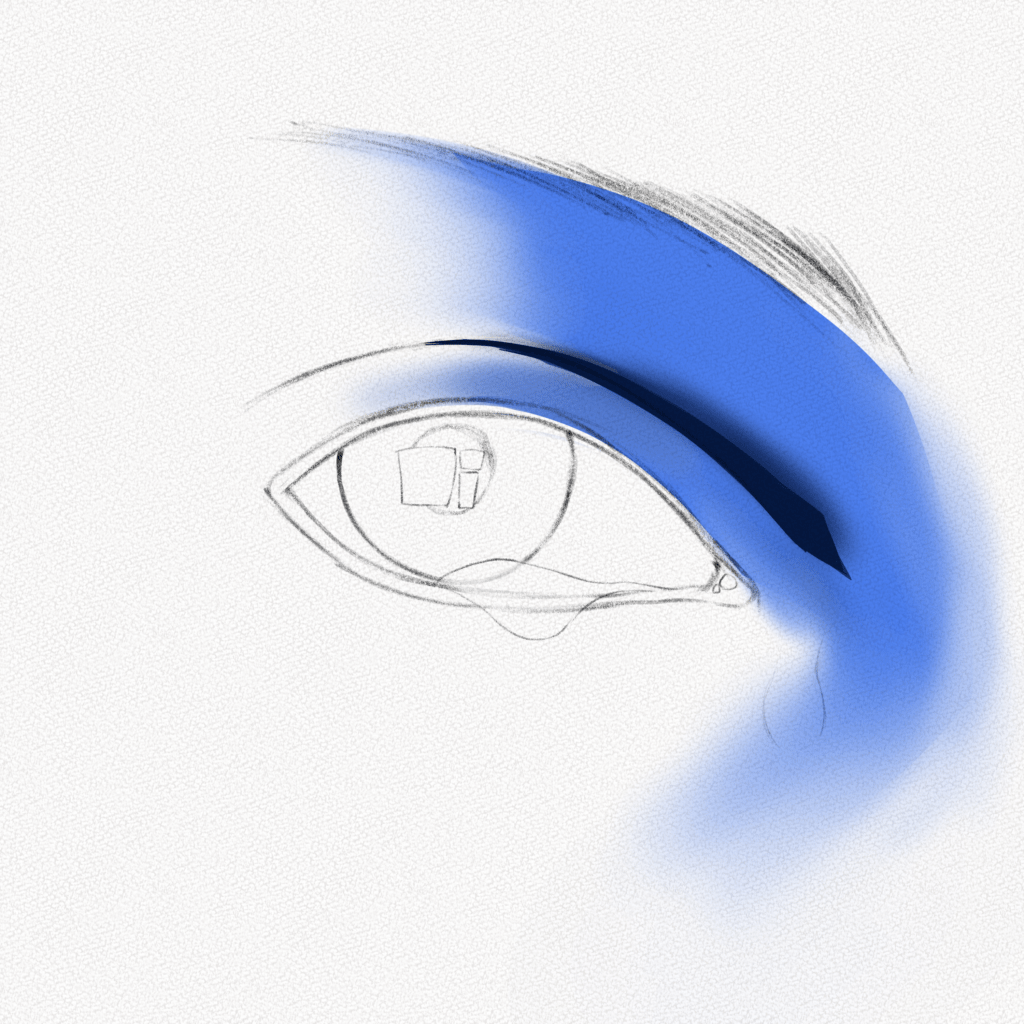
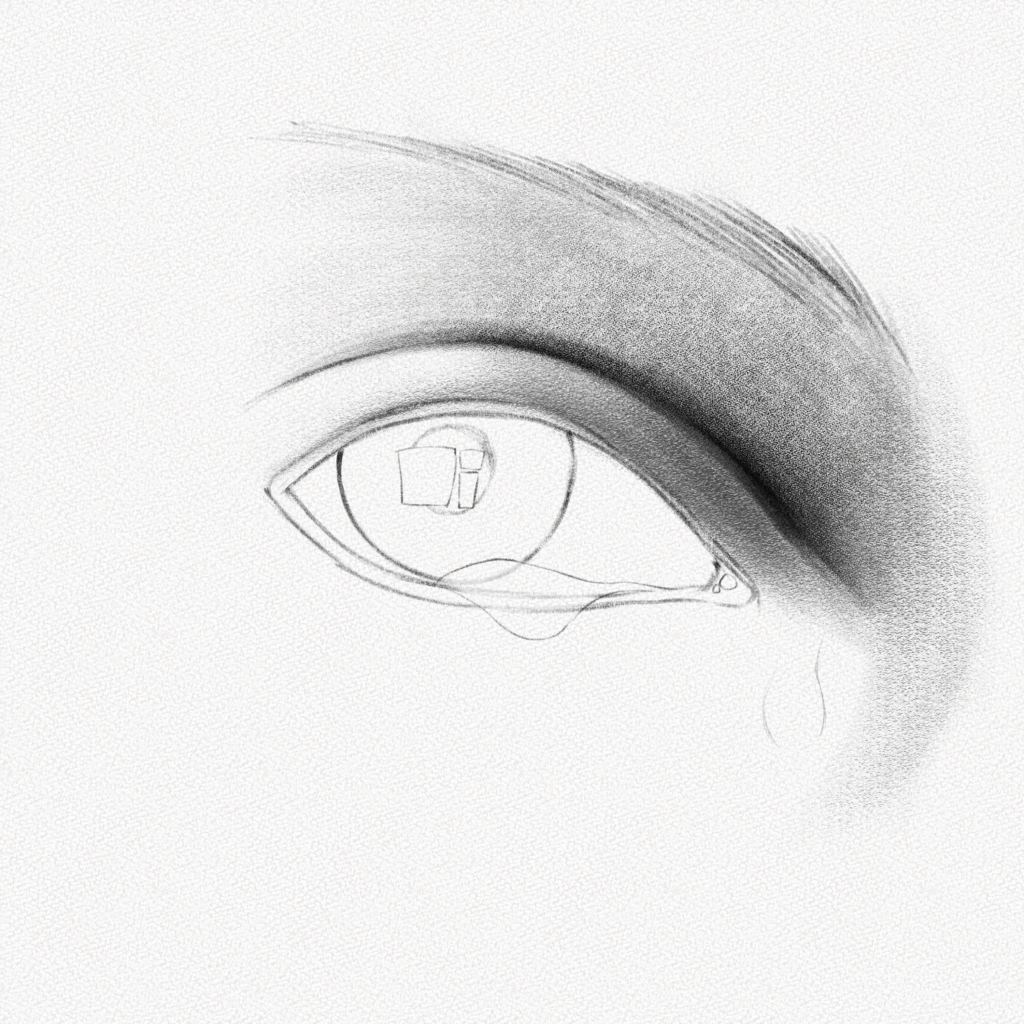
To better understand what we are going to do, I’ve marked with blue the areas we are going to shade. Dip your brush into the graphite powder, shake off the excess and start shading from the darkest part to the lightest. Apply less pressure near the lightest parts. Use your 8B pencil to darken the eyelid line and your blending stump only for the darkest part.
Step 9: Shade the lower part of the eye
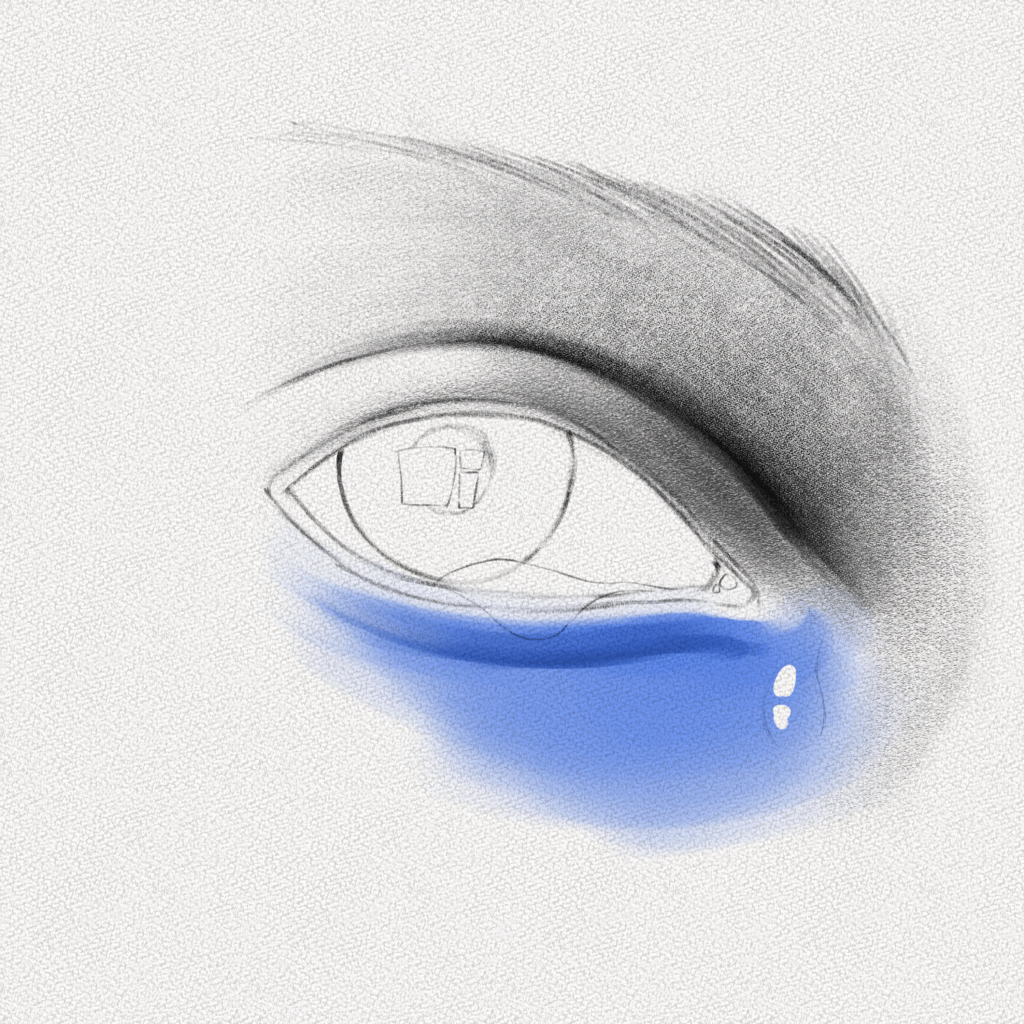
Do the same for the lower part, this time with less graphite on your brush. Use a clean end on your blending stump to blend a soft line on the lower eyelid.
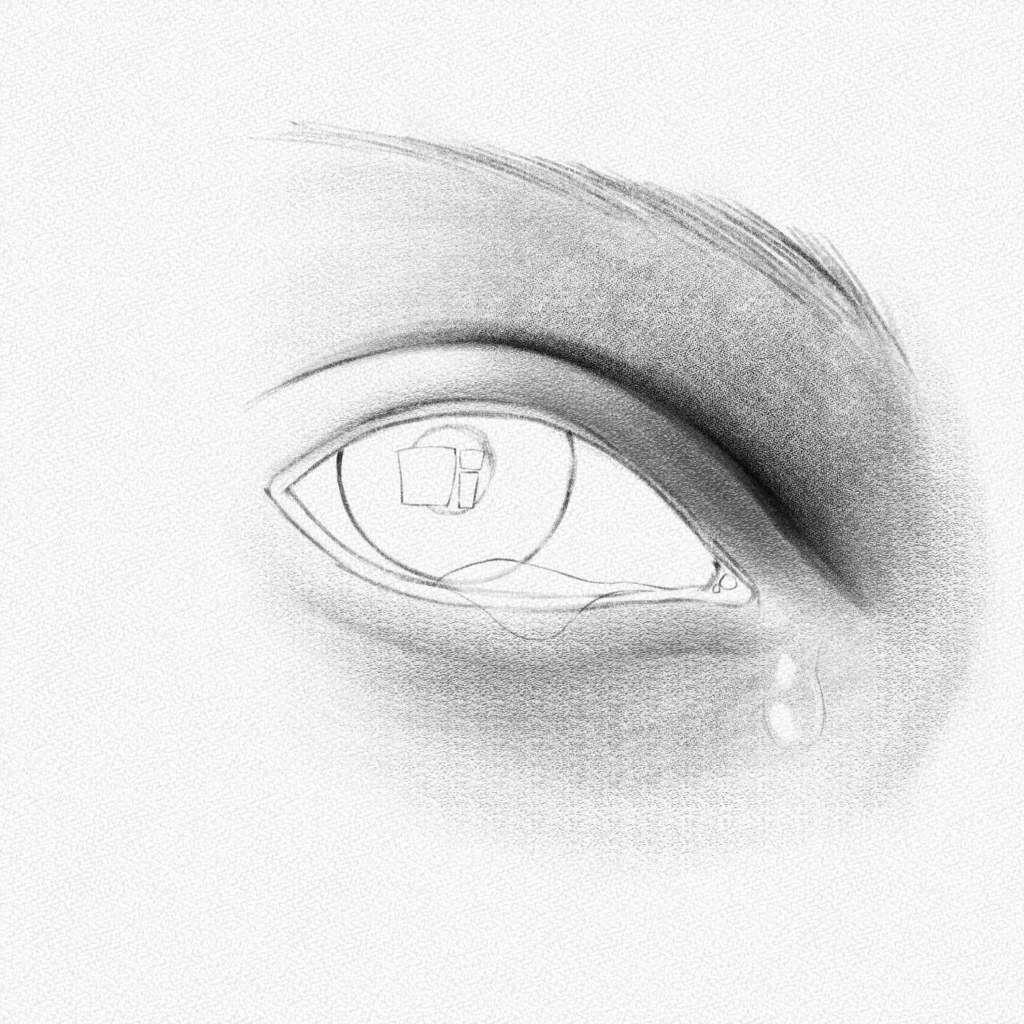
Step 10: Shade the sclera and draw the eyebrow
We will use our 8B pencil and a blending stump for this step. The process is quite simple. We will draw on top of the border of the eyes (leaving the tears and highlights), go over the top waterline a couple of times, and then pull graphite from there with our blending stump creating a soft gradient into the eyes. If you need more confidence in your skills with the blending stump, you can practice a couple of times on a separate sheet until you get a soft gradient.
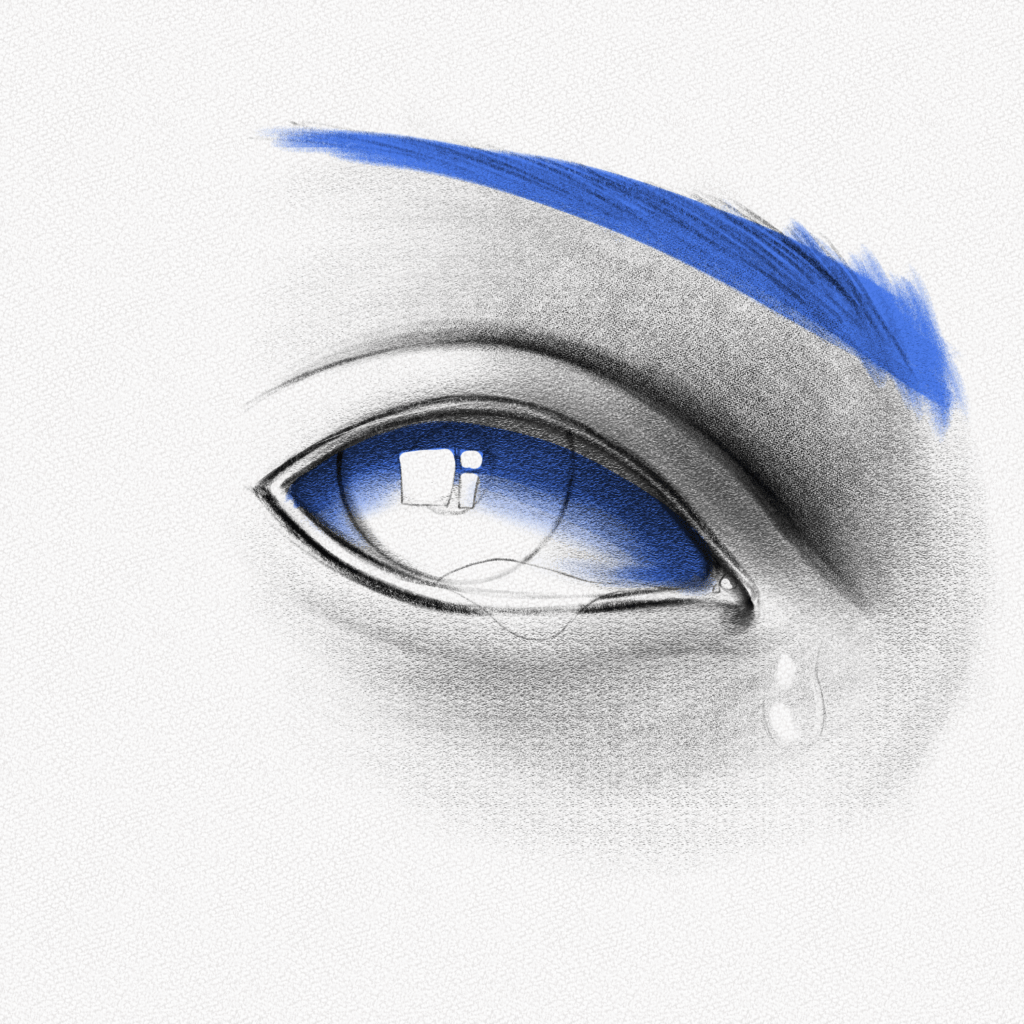
Use your 9B pencil to draw the eyebrow as well.
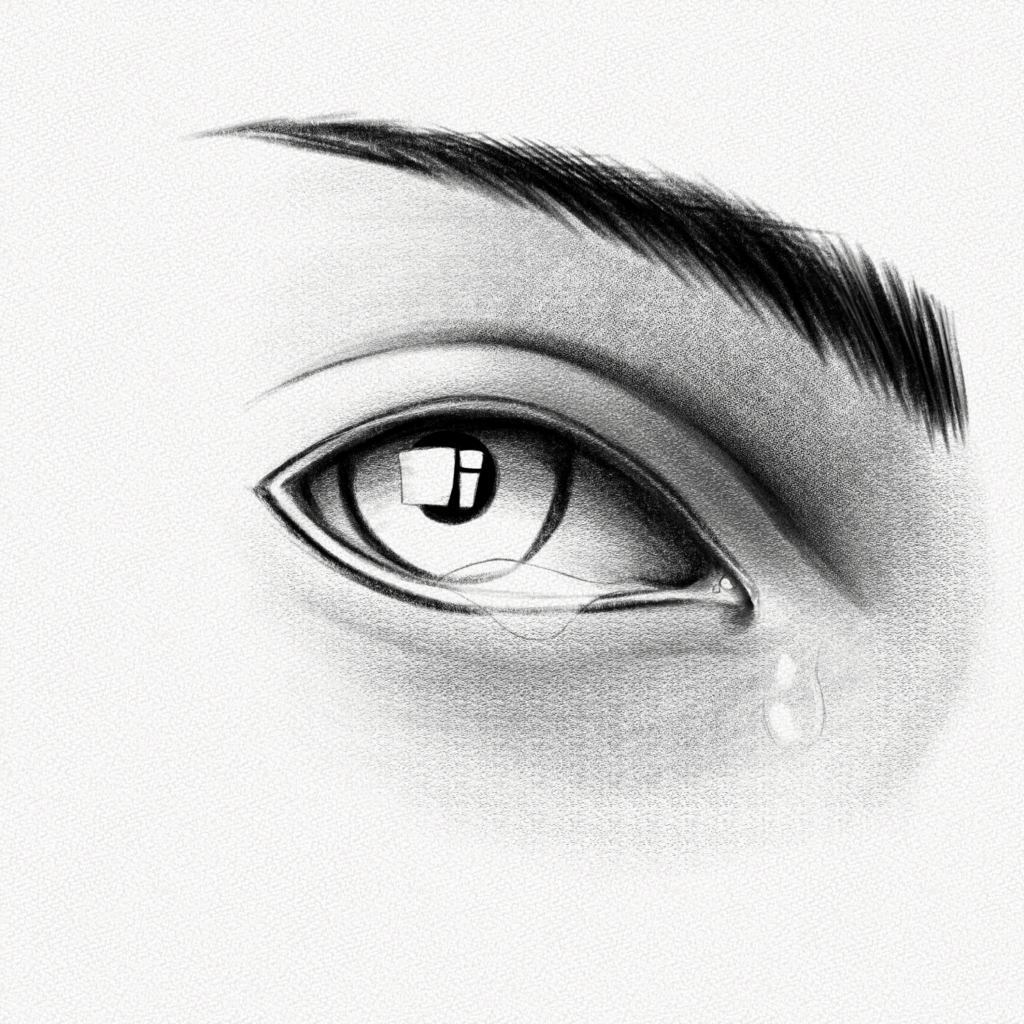
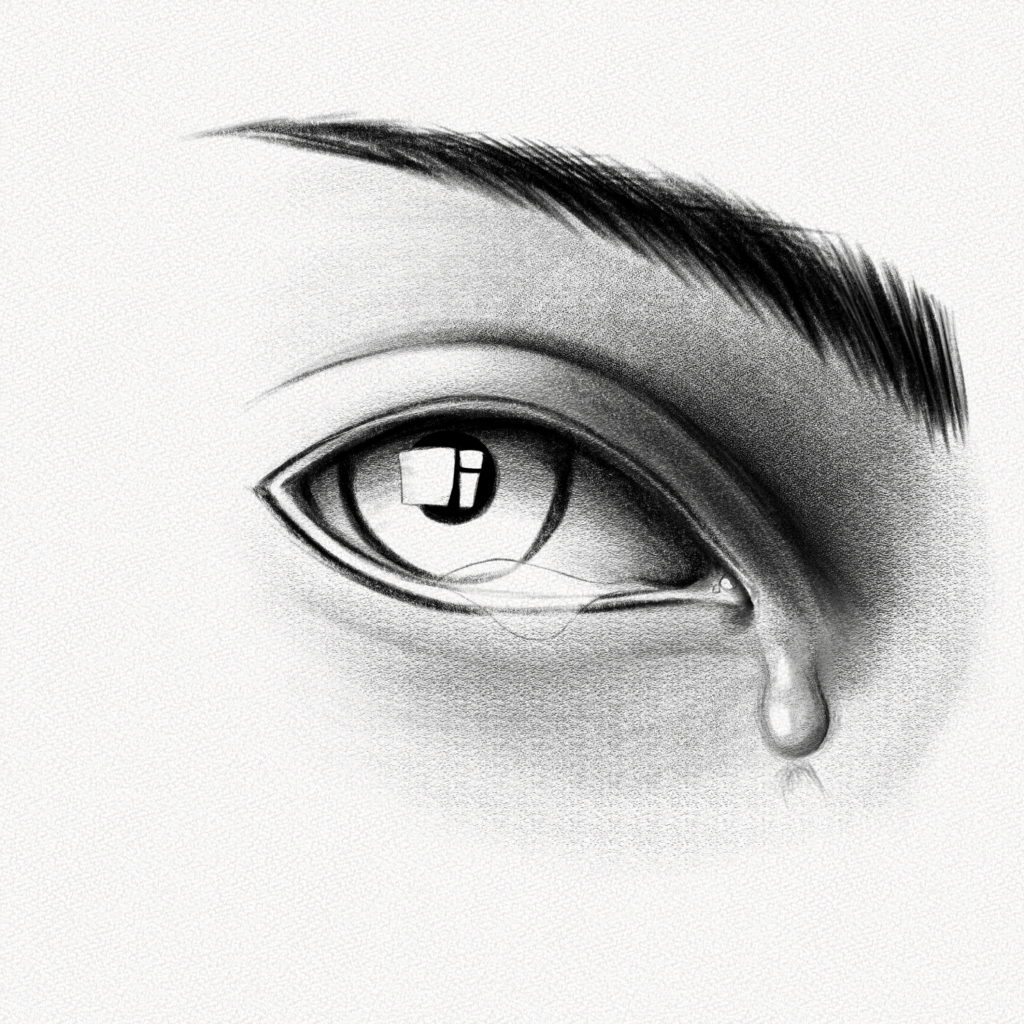
Step 11: Draw the first tear
The first tear is quite simple. Since it’s in a zone where the light doesn’t hit as much, we should follow the rules of volume, leaving some transparency and adding some shadows.
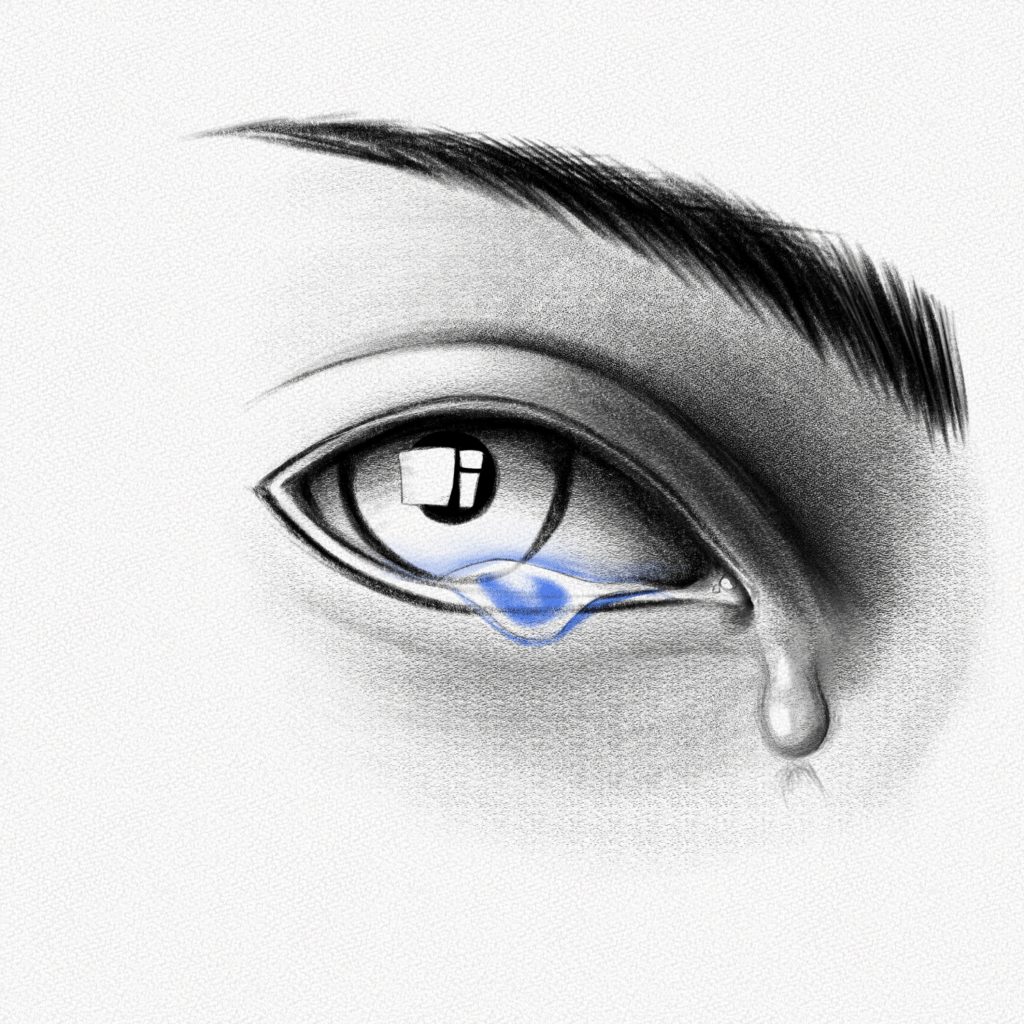
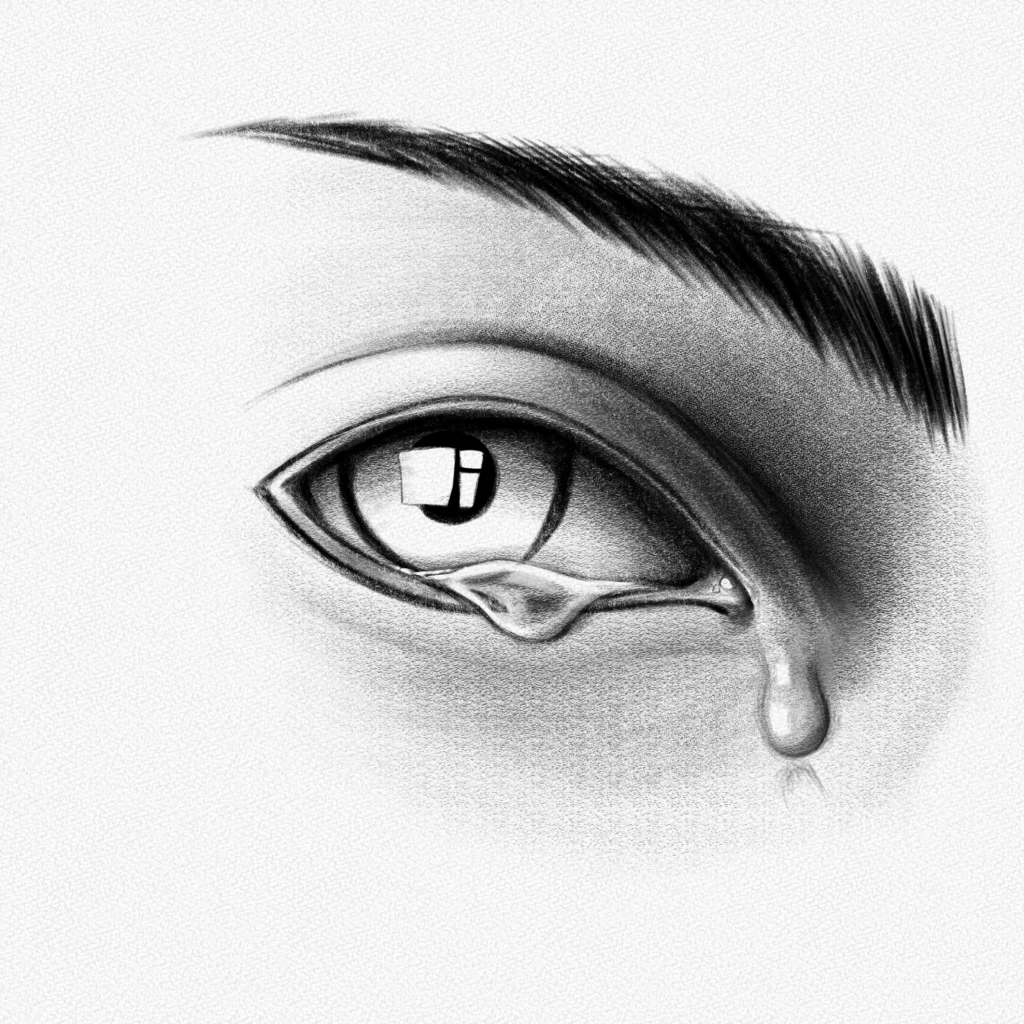
Step 12: Draw the second tear
The second tear is located in a more complex place since the light is hitting that place. We’ll shade around the tear and, in the middle of it, draw a blurry and lighter “section” of the eye. Follow the diagram if you need help understanding.

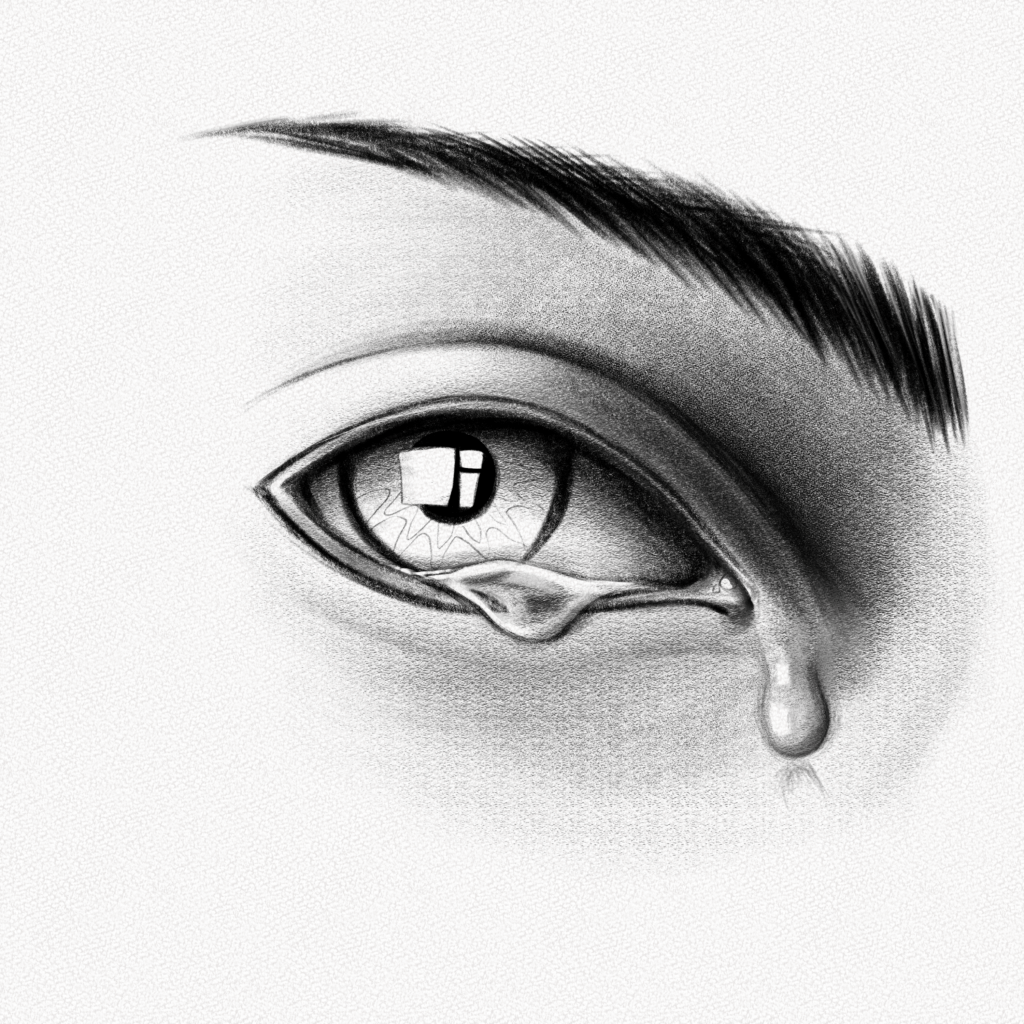
Step 13: Start detailing the iris.
Draw curved random shapes inside the iris. You can use a reference if you’re having trouble.
Step 14: Shade the borders of the iris
Use your 9B pencil to pull short, thick lines from the border of the iris to the middle.
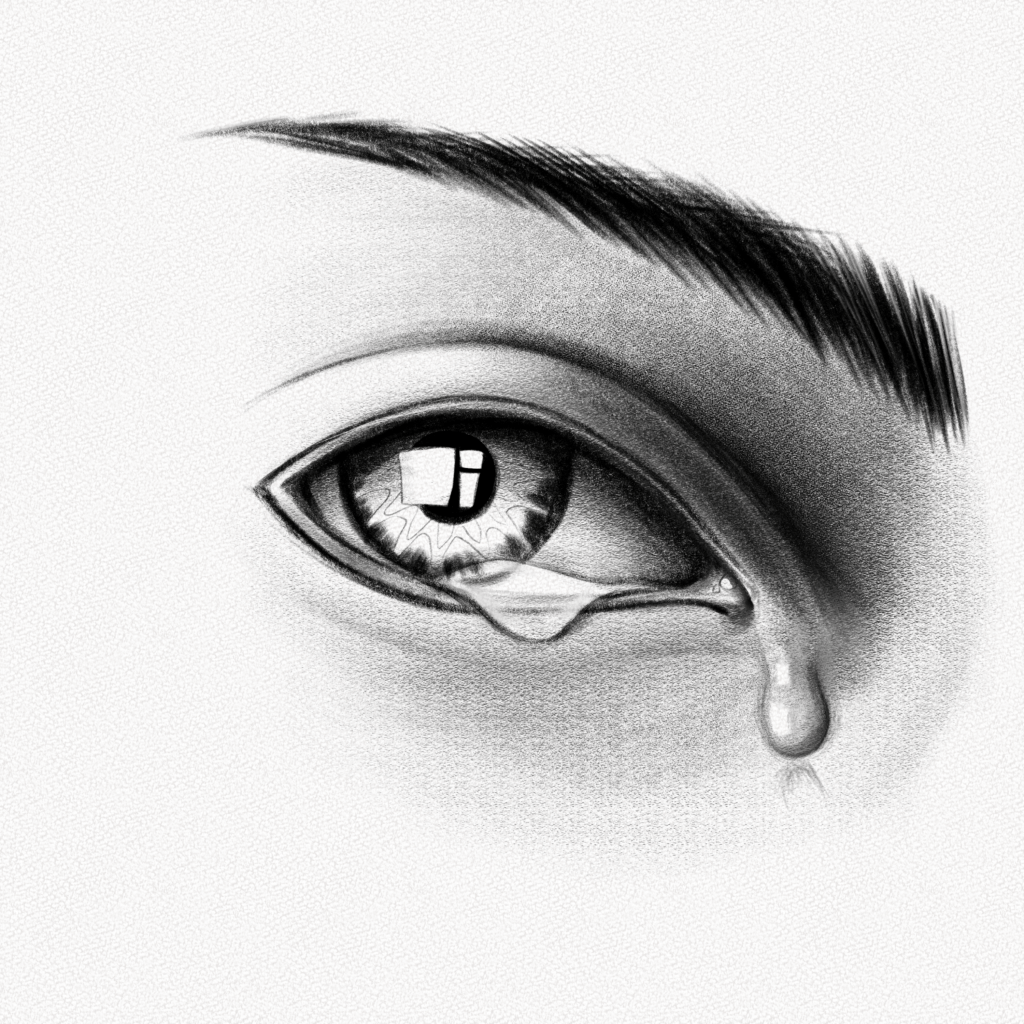
Outline the reference lines adding some middle sections to the outer curves.
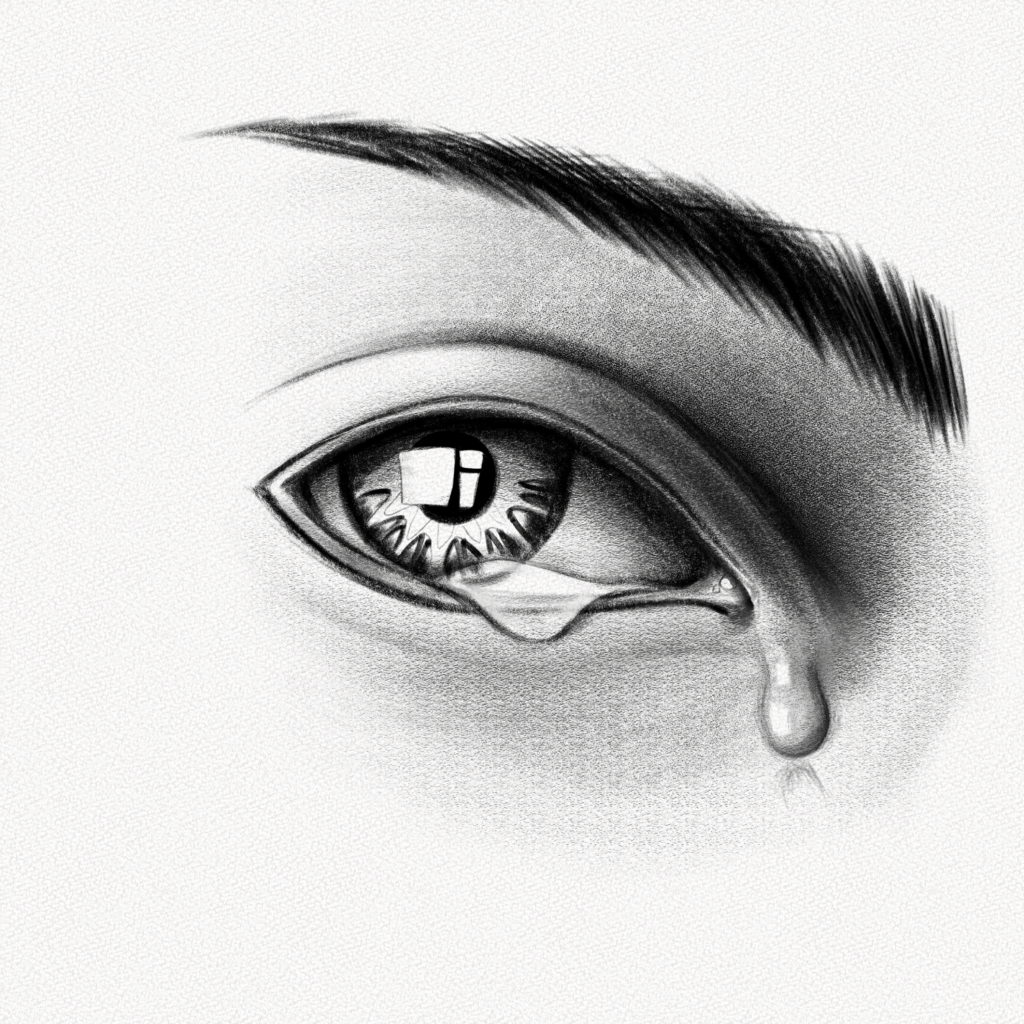
Now, pull lines from the pupil following the reference and with a very fine tip, start blending.
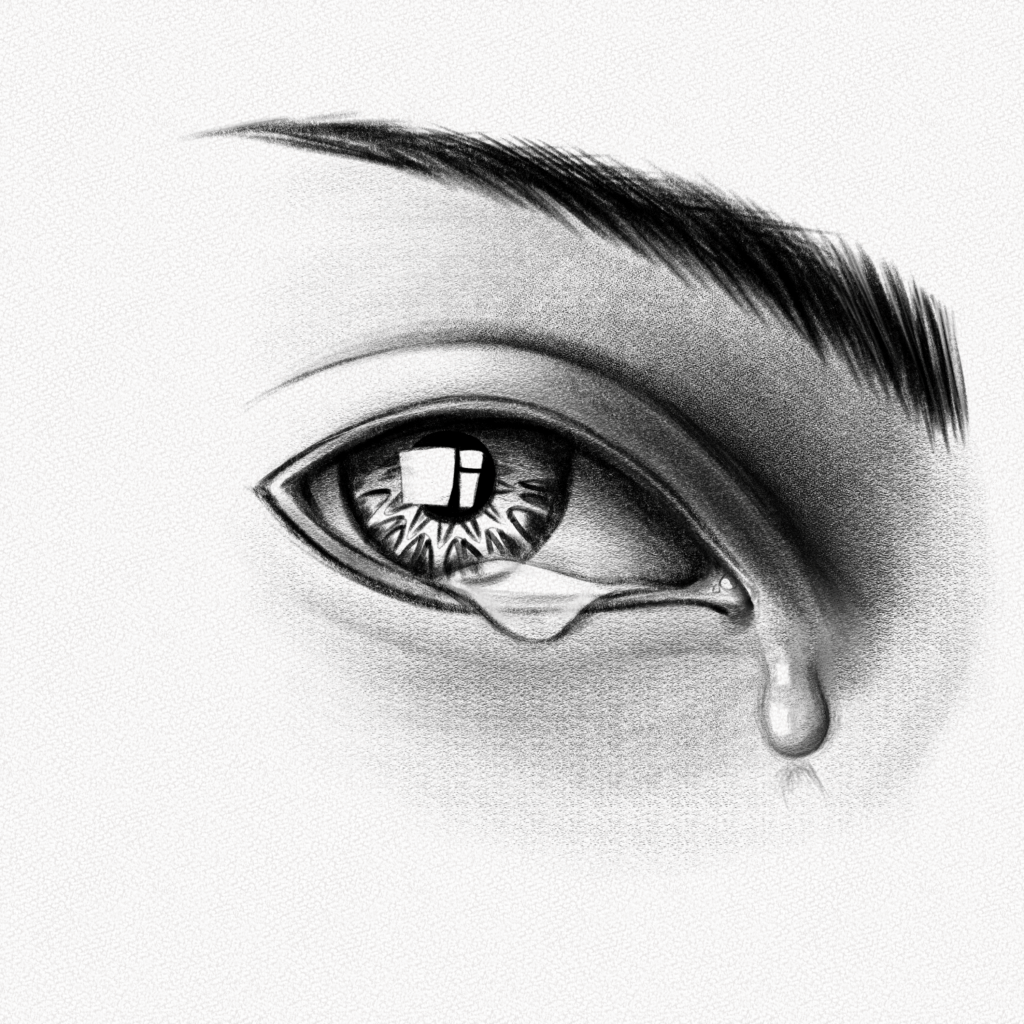
Finally, add details here and there and blend the border of the iris while darkening it if needed.
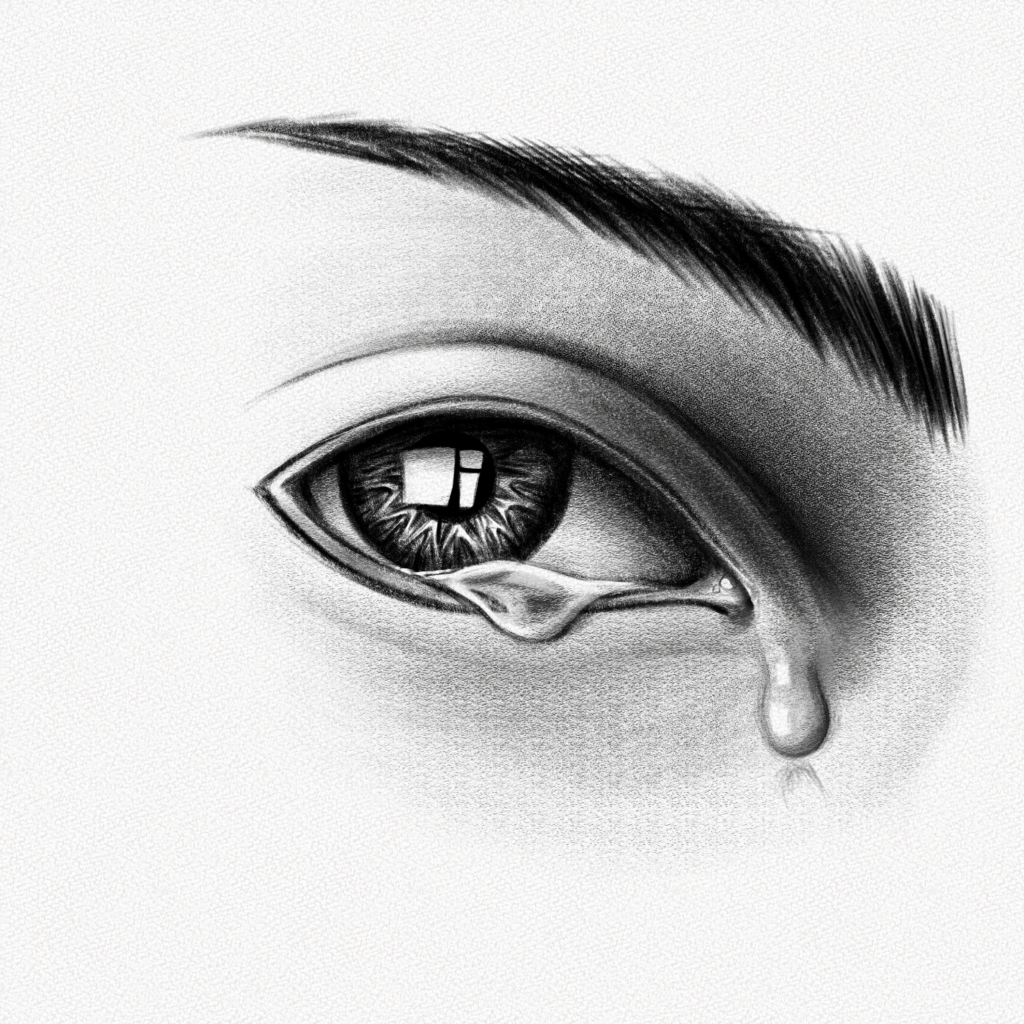
Step 15: Add the upper lashes
Use your 9B pencil to add the upper lashes. Draw them with quick movements lowering the pressure as you lift the pencil.
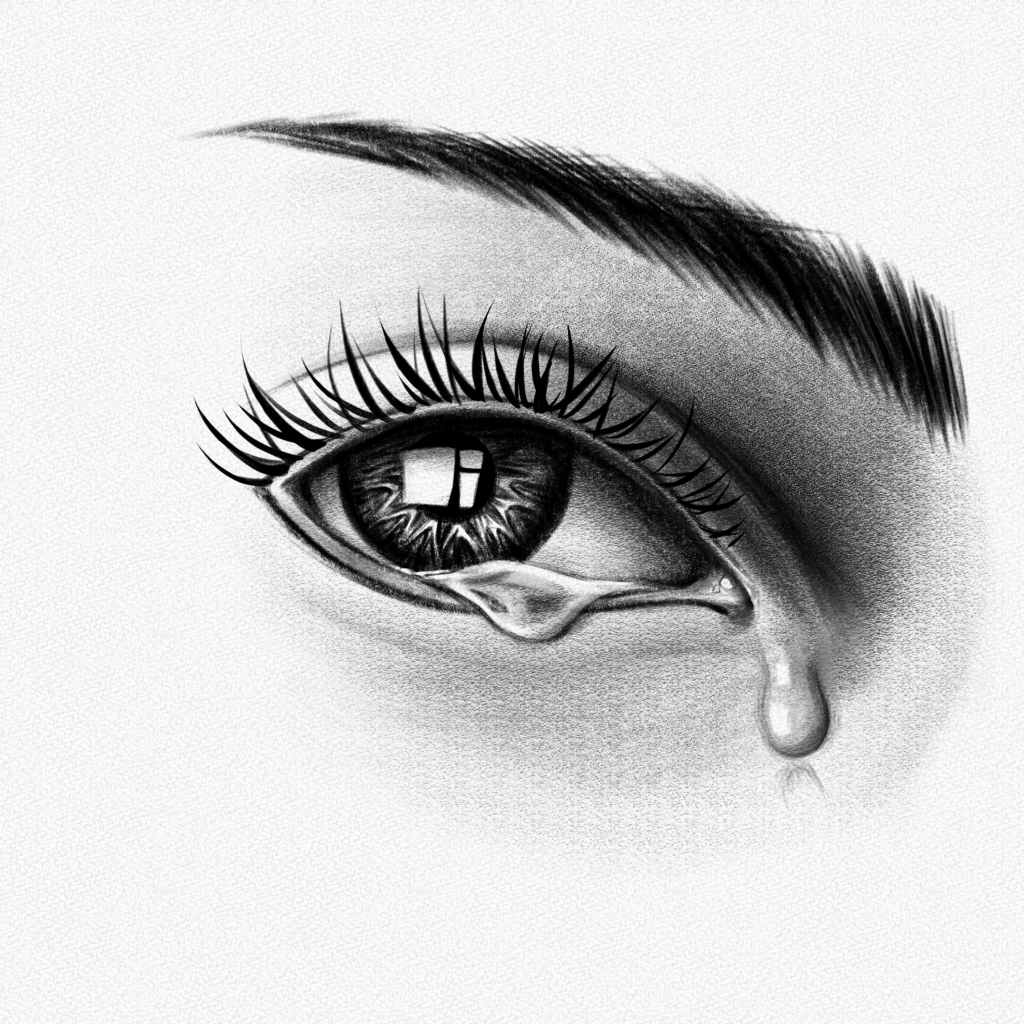
Step 16: Add the lower lashes
Use your 2H pencil for this step, draw the lower lashes and then trace over the ones you consider the darkest with a very sharp 9B pencil.
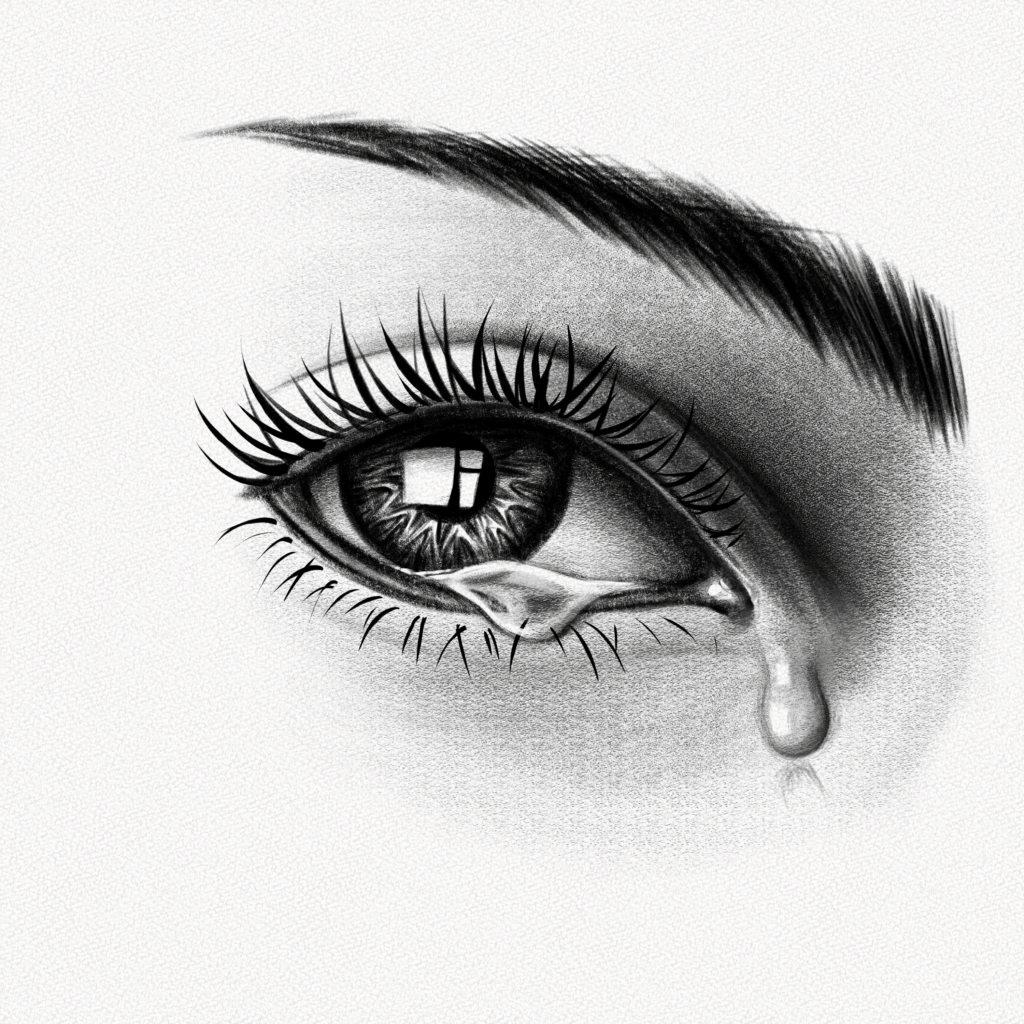
Step 17: Add some highlights
Finally, add some highlights on the waterline, the lacrimal, and the tears with your white gel pen. Draw some white lashes under the upper ones for a more realistic effect.

And that’s it. You’re done.
Thank you for following this tutorial. You did great!
Realistic drawing is always a bit of a challenge. I hope this tutorial has made your learning journey a bit easier and taught you some new tips and techniques.
Happy drawing, until next time!

